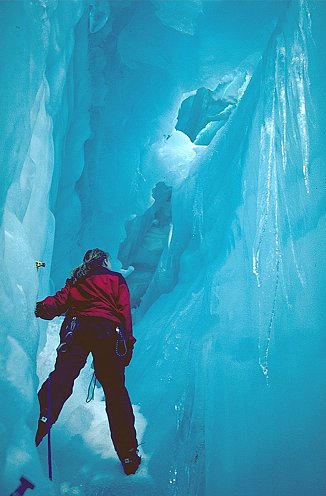
Inside a crevasse on Sarah Glacier
Inside a crevasse on Sarah Glacier
The Lemon Mountains were named after Sir Percy Lemon, pilot to the Arctic explorer and cartographer Gino Watkins who first explored the area in the 1930s. The area seems to have acquired a distinctly British connection, having solely been visited by British groups ever since!
Because of the fine rock in the Lemon Mountains it offers more difficult climbing than much of Greenland. For an area of its quality it is unvisited because it is so remote and expensive to reach. By forming an 8-person expedition, we were able to climb in the Lemon Mountains for less than £2000 each.
A list of expeditions to the area is shown in an appendix.
Danish Polar Centre
You need an expedition permit to visit Greenland. Apply to the Danish Polar Centre, Strandgade 100H, DK-1401 Copenhagen K, Denmark (tel: 45 32 88 01 00 or 01 20, fax: 01 01). Our contact was Iris Madsen (e-mail
im@dpc.dk).We were advised to apply for a permit at least 3 months before leaving (Biomedical expeditions 6 months, expeditions to the National Park by Dec 31st of the previous year). In order to issue the final expedition permit you will need signed radio/firearms/insurance/airdrop permits.
Greenland Police
At the beginning and end of the expedition you should contact the Greenland Command (tel: +299 691911/ 691955) to inform them that you are entering/leaving the expedition area. In the event of a distress signal being picked up by Ammassalik radio, the police are the first to be alerted.
Flights
Go now fly to Reykjavik for £120 return. Tel: 08456 054321 or
www.go-fly.com. Icelandair are much more expensive at about £450 return! Air Iceland is part of Icelandair so Fridrik can purchase your tickets for you. Otherwise 172 Tottenham Court Road, London. W1P 0LY. Tel: 0171 388 5599, e-mail: london@icelandair.is.
Airdrops and Glacier Landings
To be allowed to make airdrops or landings in Greenland we had to obtain permission from the Civil Aviation Administration (contact: Tobo Jorgensen) PO Box 744, Ellehammervej 50, DK-2450, Copenhagen SV, Denmark. Tel: +45 36 44 48 48, Fax: 03 03.
tojo@slv.dk.Plane Charter. We hired a ski-equipped plane from Air Iceland, as we did in 1999 (see above for address). Plane charter is the most expensive part of the expedition. There are several ways to reduce this cost:
Landing sites. We had planned to land on the Chisel Glacier, however the pilot wanted to land on the Cocker Glacier (in July 1998 the Chisel glacier was too crevassed to land on). This year both the Sarah and Chisel glaciers looked fine for plane landings; however we had to ski to and from the Cocker glacier which took 8 hours.
Airdrops
Dinner Sir? How about some tuna-and-blackcurrant-jam-mash with mayonnaise-and-chocolate-powder sauce?
Aircraft for airdrops. We used a Piper Chieftain aircraft, hired from Leifur Hallgrimsson, Myflug Air, Reykajhlid Airfield, 600 Myvatn, Iceland. Tel: +354 464 4400, Fax: +354 464 4420.
Myflug@mmedia.is Another operator is Sigfus Bjarni Sigfusson at Islandsflug sbs@islandsflug.is or Fridrik Ottesen at Air Charter Ltd, loi@itn.is. Air Island no longer has a Piper Chieftain to hire. Leifur knows Fridrik at Air Iceland, so he liased directly with him and flew from Reykajhlid to Isafjordur, to meet our sea freight the Twin Otter and us.The Piper Chieftain is a good plane to use for an airdrop because it is much cheaper than a Twin Otter and has a rear door that can be opened for the airdrop (boxes should have a cross section of no more than 50x50cm)
|
Outer case packaging. We used 70x40x40 triply corrugated cardboard boxes, banded shut with a banding machine hired from HSS hire (tensioned plastic bands closed with metal crimps). We also dropped two plastic barrels for melting water in and a plywood box for cooking on.In 1999 we dropped all our food and equipment in 50L plastic barrels, however they are not as rigid as the cardboard boxes, so we ended up with more broken food and equipment. The sides of the drum get pushed in easily, crushing the contents. Plywood boxes work as well as the cardboard boxes, however they are heavier. Packing Order. It is important to fill each barrel with items of similar density and hardness. We dropped barrels completely full of fragile biscuits and hardly any broke. In comparison the jam exploded horribly against the tins. |
|
|
Packing material. We individually wrapped every tin and packet of biscuits in bubble wrap. We triple bagged every portion of museli, custard etc. This padding and wrapping tries to contain any spillage. All the soft food for one day was packed into a thick plastic ‘day bag’. We tried 2 different sorts of bubble wrap and found that the large size (bubbles 2-3cm across) was much better. Biscuits wrapped in the large bubble wrap were completely unscathed whereas tins and fuel bottles in the small bubble wrap got quite mashed.Watch the airdrop? It is safest if you can see the barrels land, because it could be a disaster if you cannot find your food. However if you take the risk you can have a very comfortable expedition since you can make several load dumps and ski lightweight between them for little cost. |
|
In 1996 we left 10 days in between dropping and finding the boxes. On this expedition we could still see the craters 4 weeks after the airdrop and despite 3" of snow. Derek Fordham has made a number of airdrops.
Radios
|
You will need at least an "emergency radio beacon (personal locator beacon - PLB) capable of transmission on 121.5MHz and/or 406MHz with a 121.5MHz homing device for continuous transmission using an internal power supply for at least 24hours at an ambient temperature down to -20° C." You will need a radio permit for any sort of radio or beacon, the forms are provided by the DPC and the fee is DKK500 (Soeren Lynge, Radioadministration, Post Office 1002, DK-3900, Nuuk. Tel: +299 323120, e-mail: sly@tele.gl) |
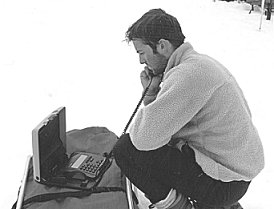
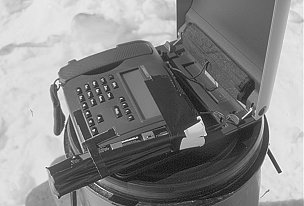
We took a satellite telephone with us. They are expensive, but worth the cost: |
|
We used it on two occasions: once when we thought we didn’t have enough fuel to last the expedition (in fact we had enough) and also at the end of the expedition to co-ordinate our collection by Twin Otter. We used the Inmarsat network and got a strong signal in the Lemon Mountains and the Lindbergh Mountains. Unfortunately the battery discharges in the cold and was dead after 1 week. We powered the radio by using our cassette recorder batteries, gaffer-taped to the phone! The microwave in the phone draws a lot of current; the batteries could only just cope after I had warmed them in my sleeping bag. Tangent Expeditions use a Solar panel to charge their phone, which apparently works fine. |
After the phone battery ran out… |
Sea Freight
We shipped our freight to Iceland, delivered direct to Isafjordur. We found two companies who freight to Iceland:
There are other shipping companies, however they mostly sell space on these ships plus a commission. 6-700Kg of freight will cost » £250 one way, insurance is 1% of its value.
Guns
Expeditions to the Greenland National Park (N Greenland) are required to bring firearms and polar bear deterrents. Within the National Park a firearms licence is mandatory, outside the park a licence is only needed for expeditions of over 3 months.
Licences are issued by the Chief Constable, PO Box 1006, DK-3900 Nuuk, Greenland (tel: +299 21164, fax: +299 24194). The permit costs DKK840 for semi or fully automatic weapons, otherwise it is free.
We hired a gun from Air Iceland, however it is debatable whether we needed one. Polar bears are usually found on the coast where they can find food (seals rather than humans?). Since we were not skiing to the coast there was a very low chance of seeing one. In 1996 we did not take a gun.
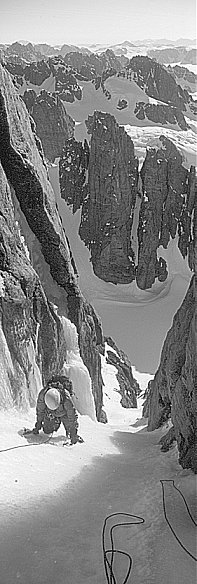
Descending from Ivor-y-Engine
Insurance
The Danish Polar Centre issues a statement that you have to persuade an insurance company to sign. They require Search and Rescue insurance for the expedition as a whole of DKK500,000 (DKK900,000 inside the National Park) and in addition require air ambulance cover for DKK250,000 per person. The companies we approached were the following:
Maps and Aerial Photos
These can be purchased from The National Survey and Cadastre, Rentemestervej 8, DK-2400 Copenhagen NV, Denmark (tel: +45 35 87 50 50, fax: 50 51, e-mail:
kms@kms.min.dk).The main map series (Dansk Geodaetic Survey 1:250 000) was surveyed in the 1930s with little change since then, so they are pretty inaccurate. The area is covered on 68 Ø.3 Kangerdlugssuaq. Amazingly enough you can also buy them from Stanfords in London (tel: 0171 836 1321)
Aerial photographs of the area were taken in August 1981 and are good, however the lens used is quite wide angle so mountains near the edge are distorted. We used photographs 778 and 396 in the 68 Ø.3 Kangerdlugssuaq area.
We laminated our maps in A4 sheets (back to back), to stop them disintegrating.
Magnetic declination is a huge 35° W in East Greenland!
|
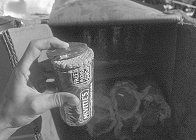
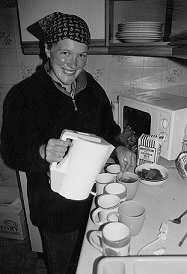
If only tea in Greenland could taste this good… |
Stoves and Fuel We took an MSR Whisperlite and two Coleman Duel Fuel stoves. We ran them off unleaded petrol bought in Iceland. Given all the hype surrounding MSR stoves they are pretty crap compared to the Coleman stove! The Coleman stove seems to have everything going for it:
Why did I buy an MSR?? The joke went something like; "MSR stoves are really nice and simple to take apart… because you need to" |
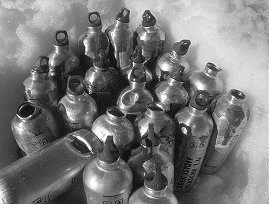
We used Aviation fuel in 1996, however the stoves were constantly getting blocked. Steve Brailey’s group had the same problem in 1998. Unleaded petrol worked much better. The fuel was airdropped in Sigg bottles. Because of the fuel bottle breakages we were rationed with 1L of fuel per day for the group, but this was not enough to melt snow with. We got around this by melting snow in barrels in the sun. I would recommend 1.25-1.5L per day for 8 people.
For 8 people we needed 2 stoves, 3 3L pans (and occasionally a 2L pan) to cook our menu.
Food
We were lucky to be given most of our food for free. We are very grateful to the following companies who supported us:
|
Company |
Items |
|
3663 (Booker Foodservice) |
Free food (porridge, custard, milk, chocolate drink, dried apricots, pasta, rice…) |
|
Van Den Bergh Foods Ltd |
Free Beanfeast, Pepperami, Flora, Cup-a-Soup |
|
Mars UK Ltd |
Free Mars Bars, Snickers, Topics |
|
Kavli Ltd |
Free Primula |
|
W Jordan (Cereals) Ltd |
Free Frueslis, Crunchy Bars and Jordan’s Muesli |
|
John West Foods Ltd |
Trade Price John West Mackerel, Tuna and Kippers |
The remainder of our food (mainly beer!) we bought from Cash and Carry.
A list of equipment taken on the expedition is given in an appendix.
We are very grateful to the following companies for supporting our expedition:
|
Supplier |
Item |
|
Burton McCall |
Free Sigg bottles and socks |
|
Lyon Equipment |
Free Julbo sunglasses |
|
Dalloz Fall Protection |
Trade Price Troll and Grivel equipment |
|
Andy Bowman Climbing Equipment |
Trade Price Mammut and Boreal equipment |
|
Rab Carrington Ltd |
Trade Price Rab clothing |
|
Alpina UK Ltd (Glenmore Shop) |
Cheap ski hire |
|
Mac Pac (NZ) |
Expedition price gear |
|
Crookes Healthcare |
Free Suncream |
We were delighted with the clothing and equipment they supplied, which is reviewed below.
Camping Equipment
|
|
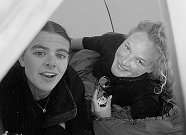
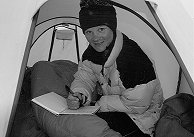
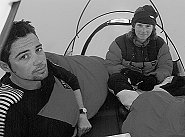
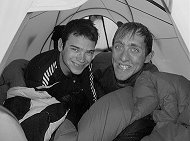
Tent life |
|
|
|
|
Tents
We took three Terra Nova tents (2 Quasars, Quasar etc) and a North Face West Wind tent. All had snow flaps added. In 1996 we had quite serious blizzard conditions, with strong winds and enough snow to completely bury the tents. As a result we recommend the following features:
By hollowing out the snow underneath the large bell end of the quasar etc. you could actually close the inner tent before you stepped outside
The tents were not tested by the weather this year. All performed well, however we preferred the Terra Nova tents to the West Wind for their strength.
|
Ground Mats Although they are expensive, Therm-a-rests are indispensable when camping on snow and ice. We have found even the thickest Karrimats feel cold and get condensation on snow. Under tents where someone has slept on a Karrimat there are pits where they have melted the snow, compared to Thermarests where you end up on a snow platform! Sleeping Bags There was quite a mixture of sleeping bags on the expedition: Mountain Equipment, Rab and Macpac 3 or 4 season down bags. All worked well, although often the bags were too hot! If we were sleeping during the day the temperature in the tent could reach 25-30° C. Pippa had an old synthetic 4 season bag, which was a bit of a disaster. Synthetic bags lose their loft with age, so my 9-year-old Snowline was fine, but her 5-year-old bag was not. Bivvy Bags In bad weather, the inner and flysheet of the tent can be pressed together by the weight of snow. Moisture in the tent from its festering occupants condenses on the inner tent and drips onto you. For this reason we took bivvy bags (Goretex and Pertex). However we didn’t use them this year. Bivvy bags are useful on short ski tours instead of taking a tent. We used them on our ascent of Bidvest peak, with very memorable views over an ice-choked Kangerdlugssuaq. |
Jim on water ice near top of Steeple |
Mess Tent
Made by Steve Fisher and designed to be large but lightweight: it has no poles. We dug a 2m deep pit, which was 1.5m wide by 3m long. Snow bench seats ran along the hole and there was a sloping entrance at one end. The tent was just a roof with lightweight ripstop nylon walls (1.5m high) held up by 50cm snowflaps and 12 guy ropes.
We stuffed shopping bags with the foam packing to make warm seats.
This formed a very friendly (!) communal room which got hot from the sun and from the stoves. It kept the chefs warm when they were cooking and was a shelter in bad weather. I don’t understand why these tents aren’t more widely used.
Snow remover. The disadvantage of a flat topped tent is that in bad weather, snow builds up on the roof, which eventually makes the tent collapse. It is very difficult to dig the snow off the roof without falling in! To overcome this we took another nylon sheet the size of the roof, with handles at either end, which we placed over the tent. When the roof had 6" of snow on, you simply lifted off and replaced the sheet.

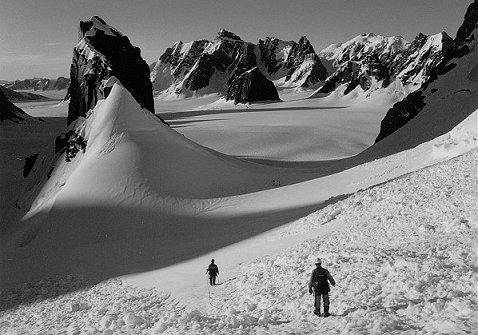
Skiing on Sarah Glacier, below Bidvest Peak
Pulking and skiing equipment
Each expedition member had a sledge, rather than taking rucksacks for load carrying. We took 4 Snowsled sledges, 2 Fjellpulken and 2 other fibreglass pulks hired from Air Iceland.
The sledges doubled as wardrobes and drying racks at camp, by propping up the traces with your ski poles.
Hiring Sledges. Sledges are not cheap, so we looked long and hard for places to hire them. You need to ask early as the sledges may be stored in another country and groups tend to hire them well in advance.
1. Arcturus Expeditions hired us Fjellpulken sledges at £40 each. Conveniently for us they were kept with Air Iceland in Akureyri. Catherine Cartwright, PO Box 850, Gartocharn, Alexandria, Dumbartonshire, G83 8RL (tel: 01389 830 204)
2. Fridrik at Air Iceland has several sledges to hire from Akureyri
3. British Schools Exploring Society, 1 Kensington Gore, London SW7 2AR (tel: 0171 591 3000)
4. Snowsled. Sometimes they have sleds for hire.
Ortilieb bags. These rubberised rucksack liners made perfect sledge bags. The sledges got wet inside during bad weather and these bags kept our spare clothes dry. The bags have a special closure system and are made from heavy-duty material that makes them completely waterproof, even if immersed in water. Several people had a 100L bag (£20).
Skis, Skins and boots
4 expedition members used Asnes Sondre Telemark Skis with Rotterfeller 3-pin bindings, the other 5 used similar metal edged telemark skis hired from the Free Heel Ski Co at Glenmore (01479 861253) with a Salomon SNS cross-country binding. Generally they worked fine, however we had a few problems:
Rupert’s skis had fishscales which allowed him to ski up moderate inclines. Because he didn’t have to stop to put on skins or wax, he moved faster on the way to the climb.
Our 35mm Pomoca skins were perfect for the job. However we needed more skins glue! Two or three large tubes would have been the right amount for 6 weeks.
We used the Royal Marines wax system: wet and dry! This is simple to use and cheap (available from most Army Surplus stores)
Climbing Equipment
We didn’t want to be restricted to certain routes because we were short on gear, so we took fairly large racks:
|
Item |
Number per pair |
Number - whole group |
|
50m ropes 9mm |
7 |
|
|
50m ropes 10mm |
1 |
|
|
Wires assorted 1-10 |
1 set |
|
|
Assorted Friends/Hexes |
||
|
Extenders |
9 |
|
|
Slings 8ft |
4 |
|
|
Slings 4ft |
2 |
|
|
Pegs assorted |
5 |
|
|
Ice Screws (screw-in/drive-in) |
3 |
|
|
Deadman |
2 |
|
|
Ab tat |
450m |
Members also each brought an Alpine Harness, 2 screwgates, belay device, long and short prussik, 2 climbing axes, crampons, rock boots, chalk bag and helmet
Since we found ice routes up to V, Vertige axes are a good idea for this area. Most people took Grivel 2F crampons, which were fine, except for the usual balling up problems. 350m of abseil tat would have been enough (we used 300m).
Personal Kit
Clothing
Because different people have their favourite clothing system, everyone took what they were used to. Clothes suitable for Scotland or the Alps are fine for Greenland, if anything it is warmer than you expect! A full personal kit list is given in an Appendix.
Rucksacks
Because we didn’t need rucksacks for load carrying most people used 50L Alpine sacks. It was nice not to have to carry the extra weight of a large sack.
Sunglasses
Lyon equipment kindly donated us 8 pairs of Julbo Spectron X8 glacier glasses, which we used on the expedition for skiing and climbing. We were very pleased with the glasses: they were comfortable to wear (e.g. Tom opposite on Haystooks), the lens colour was neutral and pleasing to look through, and they were well ventilated for skiing. Their only problem was that the side flaps had flimsy attachments that broke on 4 pairs.
Weather Log
East Greenland generally has fine stable summer weather. In 1996 we had 16 days of tent-bound weather during 8 weeks: this included several rather nasty blizzards. In 1999 we had 8 tent bound days out of 4 weeks. This year we had good weather with only 6 days tent bound in 5.5 weeks
According to folklore, the early summer in Greenland is more stable than the late summer. Several successful expeditions have visited the area from mid-May. We were advised that generally the latest time to visit the area is mid-August, after which the weather begins to deteriorate. However our expedition just north of Ammassalik in 1996 lasted until the end of August; we had our best weather then.
Note: the weather was recorded when we were climbing, which sometimes was at night. See Appendix 1 for details
|
Date |
Activity |
Date |
Weather |
Activity |
|
|
Jun 18 |
Good |
Ski to base camp 1 |
Jul 7 |
Good |
Rest |
|
Jun 19 |
Good |
Set up base camp 1 |
Jul 8 |
Good |
Bell N face, Ivory Pimple |
|
Jun 20 |
Good |
Solstice peak |
Jul 9 |
Good |
Bidvest, Castle SE turret |
|
Jun 21 |
Good |
French’s peak, Citadel |
Jul 10 |
Good – cloud |
Scalpel attempt, Muezzin |
|
Jun 22 |
Good |
" |
Jul 11 |
Cloud – snow |
Rest |
|
Jun 23 |
Good |
Bell N + S, Chisel Buttress |
Jul 12 |
Cloud/fog – good |
Rest, Tent bound |
|
Jun 24 |
Low cloud, some snow |
Sheridan Dark, Spire |
Jul 13 |
Cloud, fog |
Watchtower attempt, Castle NE turret |
|
Jun 25 |
Good – light cloud |
Rest |
Jul 14 |
Good |
Castle N, Castle S |
|
Jun 26 |
Good |
Congregation, Icon Peak |
Jul 15 |
Good |
Ski to Base Camp 1 |
|
Jun 27 |
Good |
Pulpit (both routes) |
Jul 16 |
Good – cloud, fog |
Ski to Lindberghs |
|
Jun 28 |
Cloud – low cloud |
Tent bound |
Jul 17 |
Cloud – snow |
Ski |
|
Jun 29 |
Rain – snow – rain |
Tent bound |
Jul 18 |
Wind – part cloud |
Ski |
|
Jun 30 |
Rain – good |
Tent bound |
Jul 19 |
Good |
Ski |
|
Jul 1 |
Good, high cloud |
Haystooks (all routes) |
Jul 20 |
Good |
Rest |
|
Jul 2 |
Broken cloud – good |
Chalfoun, Chisel 2 attempt |
Jul 21 |
Good |
RJ’s peak, Galleon |
|
Jul 3 |
Good |
" |
Jul 22 |
Good |
Cameron peak |
|
Jul 4 |
Good, wind |
Ski to base camp 2 |
Jul 23 |
Snow |
Tent bound (Scheduled pickup) |
|
Jul 5 |
Good, wind |
Ivor-y-Engine, Vestry |
Jul 24 |
Snow |
Tent bound |
|
Jul 6 |
Good, wind |
Steeple, Frankincense |
Jul 25 |
Cloud - good |
Pickup |
At the end of the expedition the weather closed in two hours before our scheduled collection, so it was good to have a satellite telephone to confirm the Twin Otter was not coming! We were then snowed in for 2 days…
The weather was quite warm during the expedition, which gave poor north face snow conditions. Generally snow conditions were stable (even if soft), with few avalanches; however warm weather on Jul 1,2 caused numerous North face avalanches during the ‘night’.